Categories
articles How To

Getting Around the Box.com Upload File Size Maximum Limitation

20130805mo-box-dot-com-cloud-storage

Problem. For users at the free “personal” level, Box.com has a 250MB limit on the size of a file you can upload using their web interface. You can upgrade your account to the $15 per month plan to upload files of up to 2GB in size. However, those lucky enough to have received the 50GB of storage free-for-life plan will want to avoid getting locked into paying $180 a year just to upload the occasional large file.

Solution. If you use the Box.com synchronization feature, the 250MB limit isn’t an issue. So, you can upload those occasional large files and retain your free membership level.

Update. The above work-around was previously an option. However, as of August 2013, Box.com will not synchronize files of a size that exceed your plan’s upload file size limit.

Categories
articles How To

FCC Shortwave Ham Amateur Radio License Renewal Online

20130803sa-fcc-amateur-radio-license-online-renewal-instructions

Within a few months prior to expiration, it is possible to renew a shortwave radio license (also known as amateur radio or ham radio). The FCC has a Universal Licensing System (ULS) that permits online renewal and updating of license information. Follow these steps to perform a renewal.

  1. Visit the Universal Licensing System page.
  2. Click on the option for Online Filing Log In.
  3. You will need your FCC Registration Number (FRN) and password to login. If you’ve lost these, you can click the Forgot Password link on the ULS page (see step #1 above) to be walked through the process of password recovery. It may require waiting for a reset letter in the mail from the FCC. More is explained on the Online Filing Log In page.
  4. Once logged into the License Manager (from step #3 above), you should see a message stating “This License Is Eligible For Renewal” and a link to Begin the renewal process.

Note: Your browser may at some point get stuck during the process of going from one step to the next. If this happens, you may need to clear your browser cache and cookies to start over fresh.

Categories
articles

Why URL Shortening Services Like TinyURL and Bitly Sometimes Don’t Work

Services like TinyURL.com and Bitly.com work most of the time. However, here are a few rules to remember:

  • Account Specific Pages. There are many websites for which, once you login, you will see information specific to your user account that won’t show up for anyone else unless they are logged in as you.
  • Amazon. When on Amazon, if you’re looking at a product, the address for that page is much longer than what you’d actually need to share. Here’s an example of an Amazon link without the extraneous text. The number at the end (B0077L8YOO) is the unique product number. http://www.amazon.com/Fitbit-Wi-Fi-Smart-Scale-Black/dp/B0077L8YOO/
  • Magazines. Some magazines won’t allow non-registered visitors access to much of their online content.
  • Newsletters. When looking at online newsletters, the URL may include your subscription information. Similarly, when you forward an email newsletter, you may be forwarding secure links that allow you to adjust your subscription details or unsubscribe. This includes RSS Feed Readers services.
  • Newspapers. Some newspapers won’t allow non-registered visitors access to much of their online content.
  • Real Estate Website. If you’re on a real estate website and want to share the link to a property you’re looking at, you may be inclined to copy and past the address as the basis for the short URL. However, if you’re logged into the real estate website, then the link you have may only be a temporary link or search result. The link may have ‘session’ information (like temporary random numbers) embedded in it. So, instead, click on the little bird icon for Twitter. This will open a new window preparing to post a generic universal link on Twitter. You don’t need to actually post on Twitter, just take the resulting link and use that. If there’s a Facebook or email sharing option, these will work in a similar way.
  • YouTube. Often when you’re looking at a video on YouTube, the URL address for that video is much longer than needed. It may include playlist information, and information about what page you were on previously. The link may also force the video into full screen mode (which isn’t always the best view). So, with YouTube, it’s best to use the shortest link possible. Usually you can get this by clicking on the share option below the video.
Categories
articles

Network Solutions Email Client Settings for IMAP, POP3, and SMTP

20130802fr-network-solutions-email-client-settings-configuration

Users of Network Solutions email may experience problems if they don’t have their email client settings configured properly.

UPDATE: 13 May 2024

As of May 2024, the following settings were tested to work with Outlook for Windows.

  • Incoming Mail Server
    • Server: web-imap-oxcs.hostingplatform.com
    • Port: 993
    • Encryption method: SSL/TSL
    • No checkmark for “Require logon using Secure Password Authentication (SPA)”
  • Outgoing Mail Server
    • Server: web-smtp-oxcs.hostingplatform.com
    • Port: 465
    • Encryption method: SSL/TSL
    • No checkmark for “Require logon using Secure Password Authentication (SPA)”

You will initially provide your email address and the email password to begin the process of setting up the account. Then you will need to select the option to manually configure the email to use the settings above.

Some people may have recently been experiencing trouble with receiving or sending emails with Microsoft Outlook. In some instances, removing the email account and adding it again may help. If you’ve been using IMAP email synchronization, your emails are saved on the server. However, if you’ve been using POP3 (download only) there is no synchronization. Read the warning below.

WARNING: If you plan to remove your account from Outlook and add it again, be very careful to not lose any emails saved on your computer. If you’d been using POP3 email settings in your email client, that means the emails get downloaded from the email server and possibly removed from the email server over time. In this scenario, the emails and folders saved on your computer are not saved anywhere else. When you “delete” a POP3-configured email account from Outlook, the folder structure and all emails may disappear. With Outlook, it is best to have a separate PST file as an archive where you save your emails. Get technical assistance with this if you are not sure how your email is configured in Outlook.

Note that the server settings initially described in this document had worked for several years. As of May 2024 it seems the settings were no longer working.

Some content on this page is more than 10 years old and likely no longer accurate. It’s provided here as a record of the changes to mail settings over time.

UPDATE: 28 Jul 2022

The document below from 2013 continues to be read by many people. The instructions are generally still helpful.

As of 28 Jul 2022, the incoming and outgoing server information has been updated. This new information is based on a call today with Network Solutions support.

Users of Apple Mail for Mac computers should use the manual setup process by following these steps:

  1. From the Apple menu, go to System Preferences.
  2. Click on Internet Accounts from the main System Preferences page.
  3. Choose to add a new Mail account.
  4. Put in your name, email, and password.
  5. You will then get a pop-up box
    1. Email Address will already be filled in
    2. For User Name, enter your email address.
    3. Account Type should be IMAP
    4. For Incoming Mail Server, enter:
      netsol-imap-oxcs.hostingplatform.com
    5. For Outgoing Mail Server, enter:
      netsol-imap-oxcs.hostingplatform.com
  6. Click the blue Sign In button.

In the past, you would get a certificate error, but now with the new mail server address above, your email should work and show up in the Apple Mail program.

Below is the content of this document as it was posted in 2013.

# # #

Network Solutions Recommendation

Additional Instructions

Here are some additional instructions you may want to try. As of August 2013, the settings are as follows.

INCOMING MAIL SERVER (IMAP)

  • username: your full email address
  • password: your email password
  • incoming server: mail.yourdomain.com
  • port: 110 (POP3) or 143 (IMAP)
  • SSL: yes, use SSL can be enabled for security and this will change the port to 993

OUTGOING MAIL SERVER (SMTP)

  • outgoing server: mail.yourdomain.com
  • authentication: yes, requires authentication
  • username: your full email address
  • password: your email password
  • port: 2525 or 587 (for pop3 and imap)
  • SSL: yes, use SSL can be enabled

Apple Mail Client Default Folders

If you’re using the Apple Mail client on OSX or iOS devices, the client will create its own folders on the IMAP server to use. This is confusing since folders already exist on the server. If you’re exclusively using Apple devices, then it might be easiest to just use the folder system that Apple has devised. Then when you look at the Drafts folder or Sent Messages (for example) you should see your drafts on all devices.

  • Apple Mail Folders Created by Apple Mail Clients
    • Deleted Messages
    • Drafts
    • Junk
    • Notes
    • Sent Messages
  • Network Solutions Mail Folders
    • Draft
    • Sent
    • Trash

Note that emails sent from the Network Solutions web mail system will end up in Sent, not Sent Messages, since the Network Solutions system is configured to use their default folders and not ones created by Apple.

Also, it’s very important to note that your iOS device may default to saving sent messages on your device. This means that you’ll have no record of your sent messages on any server, and if your phone is lost or damaged, you’ll lose all those messages. Also, if you delete your email account and install it again (perhaps as an attempt to fix an email problem), you’ll lose any messages that were stored on your phone and not on the server. You may want to change the default setting to save sent messages (and drafts) on the server so they are accessible from other devices.
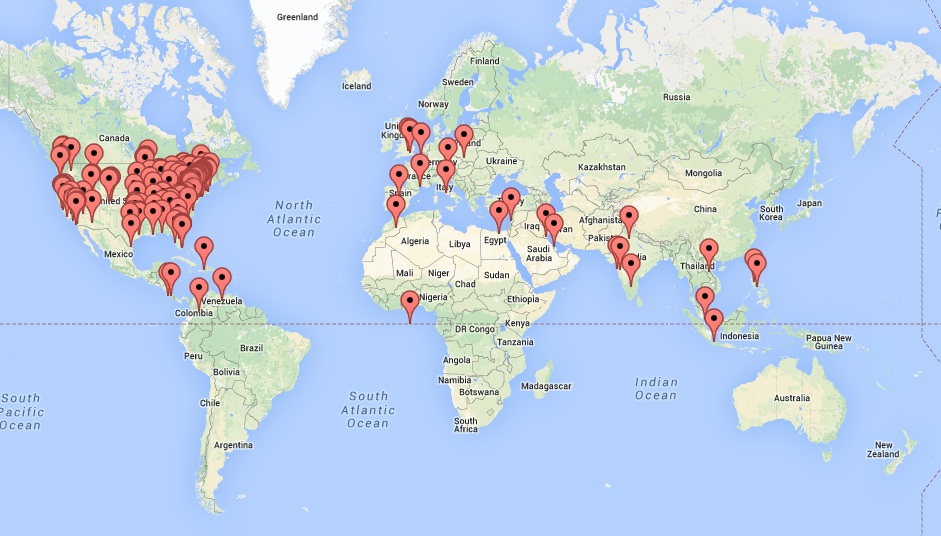
Global Page Visits

Recent page visits are shown below and illustrate the geographic locations of readers. Click the map for a larger view.

20140215sa-network-solutions-email-client-settings-for-imap-pop3-and-smtp-global-page-visits

Document History

This document was first created on 2 August 2013. It has been updated over the years to keep it useful. The only reason this page exists and continues to be popular is presumably because adequate documentation is not available from Network Solutions.

Categories
articles

QuickBooks Online Payroll by Intuit

20130730tu-quickbooks-online-payroll-intuit-357x500Summary. If you ever get setup with the QuickBooks Online Payroll service you may have some difficulty canceling the service.

The only subsequent communications you’ll receive from the company will be in the form of a monthly invoice from this email account:

  • QuickBooks Online Payroll Support Team <QBOPayrollNoReply@intuit.com>

Poor Business Practice. Unfortunately, the invoices for the service have no contact information. This is, of course, poor customer service and also a violation of Federal laws governing the sending of emails. It’s also unprofessional. They are text-only emails without any recognizable logo or branding. Most financial institutions, businesses, and organizations will include unsubscribe and cancellation information in all their correspondence. Intuit intentionally seems to be leaving their customers in the dark to make cancellation a difficult process.

Cancellation Process. To cancel the QuickBooks Online service and Payroll service, follow these instructions.

  1. Call Customer Support at 1-888-537-7794, weekdays, from 6:00 am to 6:00 pm PT.
  2. Request to cancel QuickBooks Online. The sales/support person will most likely ask you to login.
  3. You will need to login at https://qbo.intuit.com
  4. Click on Your Account, and choose Your Account from the drop-down menu.
  5. Click on the Cancel Subscription link.
  6. Fill out the survey.
  7. If you request a refund, you’ll only get 60 days refunded, even if you’ve been billed for many months and not used the service. The QuickBooks Online Simple Start is $6.47 monthly if you get the special discount. So, your maximum refund would be $12.94. This will cancel your QuickBooks online service. However, the credit/refund may take a week to show up.
  8. Now you need to cancel the Payroll module which requires that you be transferred to the Payroll services group at Intuit. You may hear a recorded message stating, “We are currently experiencing high call volume and unusually long wait times. … You can reach us online…” Don’t hangup. They won’t let you cancel the service through any online means. So, the extended wait times are designed to be a further deterrent to people wanting to cancel.
  9. If you get disconnected after waiting an extremely long time, call QuickBooks Payroll at 1-877-202-0537. The sales person can arrange for a refund.
  10. You will probably need to login to QuickBooks Payroll at http://payroll.intuit.com
  11. Continue to wait forever to get a sales person to help you. While you wait, keep in mind that you were entrusting your entire business to these people who can’t even pick up a phone.
  12. In this particular example, it took over 40 minutes before reaching this step.
  13. The Payroll refund will be $42 for two months (at $21 per month). The credit should show up in about a day or two.
  14. This concludes the cancelation process.

You’ll get a survey based on the above experience. There is no survey for “How did you like how Intuit does business?”

Categories
articles

Best Buy Reward Zone Premier Silver Membership Benefits

20130728su-best-buy-reward-zone-silver-189x167The Premier Silver membership is the highest level that Best Buy will award. This level is achieved by spending $2500 or more in a calendar year at Best Buy® and BestBuy.com®. These are the benefits:

  • MORE Points. 25% point bonus1 and more flexible redemption options. And remember, points add up even faster with the Reward Zone Credit Card with standard credit financing. Choose to have your reward certificates issued automatically, or choose point banking to let your points build until you want to redeem them.
  • FREE Helpline. We’ll help you with basic product setup, purchase recommendations and Reward Zone account questions by calling 1-866-RZ-PREMR (1-866-797-7367).
  • MORE Time. We want you to ensure you love every purchase. So contact the Helpline for help with setup. Or, get a recommendation on an exchange that better fits your needs. Best of all, you have plenty of time to decide with a 60-day return and exchange policy on qualifying Best Buy and BestBuy.com purchases. Enjoy 180 days to use your reward certificates.
  • FREE Expedited Shipping and FREE Delivery. Online and in-store. For online purchases, simply add your Reward Zone number to yourBestBuy.com account.
  • PREMIER Access. Get some of the hottest new technologies in store or at BestBuy.com as well as Premier access to iconic sales.
  • FREE Gift Guidance. Find the right gift for anyone, yourself included, with our personal shopper service, available at personalshopper@bestbuy.comor 1-866-923-6190.
  • FREE House Call from a Geek Squad® Agent. To schedule, call 1-866-RZ-PREMR (1-866-797-7367). We’ll help you make the most of your technology with your choice of one of the following services per year:
    • TV Calibration – Having an HDTV is one thing. Having it personalized to your exact needs is another. Our ISF-certified installers will come to your home and calibrate your HDTV so you’re seeing it the way it was meant to be seen.
    • Setting up your home wireless network (or upgrading your current one) so that you’re able to safely and securely surf the Internet at blazing fast speeds. (router hardware not included; Agent will connect up to 2 devices).
    • Personalized training for one hour so you’re able to harness the full power of your devices.
    • Customized programming of your Harmony TV Remote, giving you the convenience of controlling your entire home theater system with one remote.
    • Home Theater Consultation A Geek Squad agent will design and lay out a system that captures your home theater dreams, and works within your budget. Our agent can also help you choose products that work best with your design.
Categories
articles

Celtx Free Screenplay Film Script Writing Software with Storyboard and Cloud Support

20130722mo-celtx-screenplay-film-writing-software-with-storyboard-528x246Over 3,000,000 storytellers in 170 countries create in Celtx. Celtx is leading the charge to democratize filmmaking, with software and services that are free or affordable by all. The Celtx community gives back to communities with a Seeds program that rewards your great storytelling.

Celtx is the world’s first all in one pre-production system. It replaces ‘paper & binder’ with a digital approach that’s more complete, simpler to work with, and easier to share.

A few videos about Celtx are below. Learn more at Celtx.com.

Installing Celtx (below)

[youtube=http://www.youtube.com/watch?v=vlcR0bkpC4M]

Synchronizing Celtx with the Cloud (below)

[youtube=http://www.youtube.com/watch?v=UyvJMRyYSdM]

Uploading & Sharing from Celtx Edge (below)

[youtube=https://www.youtube.com/watch?v=NAnzySCbo1Y]

Using Celtx in Full-Screen Mode

[youtube=https://www.youtube.com/watch?v=aE7bmXChe-k]

Starting a new Project in Celtx

[youtube=http://youtu.be/mpIr8Ki0eYw]

Producer Reaction to Using Celtx

[youtube=http://www.youtube.com/watch?v=vGR09ZVPOIY]

Categories
How To

Default Save to iCloud Configured for Apple OS X 10.6.4 Mountain Lion

The default location for saving iWorks documents is the iCloud in Mountain Lion when Documents are set as being synchronized to the iCloud.

To change this, go to Terminal (in Utilities) and paste in the following command:

defaults write NSGlobalDomain NSDocumentSaveNewDocumentsToCloud -bool false

Then press Return. Then type exit. When you restart the iWorks applications they will default to the folder of your choice.

Categories
articles

Apple TV: Using the Apple Wireless Keyboard

20130712fr-appletv-offerings

Summary. The Apple TV device turns a television into a computer-like device for multimedia content only. This means your interactions with Internet destinations are limited to a few content providers such as YouTube, Netflix, HBO, Hulu Plus, ESPN, and others. Content is also available through the Apple iTunes store, including movies, television shows, podcasts, and more.

Typing. Unfortunately, there’s no keyboard included, so one must navigate their way through this ocean of amazing content using a very time consuming hunt-and-peck on-screen keyboard (shown below) moving one click at a time to the letter, number, character, or button of their choice.

20130712fr-appletv-on-screen-keyboard

Using the Apple Wireless Keyboard

Most people will find it preferable to use the Apple Wireless Keyboard (shown below) with their Apple TV. Instructions to make this work are found below.

20130712fr-apple-wireless-keyboard-top-view

System Requirements for Using Wireless Keyboard

  • Apple TV (2nd generation or later)
  • Apple TV Software 5.2 or later
  • Apple Wireless Keyboard *

Third-party Bluetooth keyboards that use the Apple keyboard layout may also be compatible. Check with the keyboard manufacturer for additional information.

* The original Apple Wireless Keyboard (2003), that features a white case and uses four AA batteries, is not compatible.

Pairing your Apple Wireless Keyboard with Apple TV

To pair your keyboard with Apple TV:

  1. Turn on your keyboard and if necessary ensure that it is discoverable. A blinking LED indicates that the Apple Wireless Keyboard is in the discoverable mode.
    • When using third-party devices, check with the keyboard manufacturer for additional information.
  2. On your Apple TV, select Settings > General > Bluetooth.
    20130712fr-apple-tv-wireless-keyboard-setup-step-2
  3. Select your keyboard in the list.
    20130712fr-apple-tv-wireless-keyboard-setup-step-3
  4. When prompted, type the four-digit paring code on your keyboard and then press Enter or Return.
    20130712fr-apple-tv-wireless-keyboard-setup-step-4
  5. Apple TV will confirm that the pairing process is complete.
    20130712fr-apple-tv-wireless-keyboard-setup-step-5

Using your Apple Wireless Keyboard

You can use your keyboard to:

  • Enter text and other information (search, email addresses, passwords, and so on)
  • Navigate Apple TV menus using the arrow, Return, and Escape keys
  • Jump to an item, title, or name on the screen by typing the first few letters (for example, when viewing your music collection, you can type a song title or artist name to jump to it in the list)
  • Use media controls when playing music and video to play or pause content and select previous or next.

Volume, brightness, and other controls are not available for Apple TV. Apple TV uses the U.S. English keyboard layout regardless of the keyboard’s hardware layout.

Disconnecting the Apple Wireless Keyboard

If you want to stop using your keyboard or disconnect it from the Apple TV:

  • Select Settings > General > Bluetooth
  • Select your keyboard and then select “Forget this device”

20130712fr-apple-tv-wireless-keyboard-forget-device

Additional Information

Troubleshooting your keyboard

If you are unable to see your keyboard when you attempt to pair it with Apple TV, check that your keyboard is:

  • Powered on and in range of your Apple TV
  • Set for discovery or pairing
    • A blinking LED indicates that the Apple Wireless Keyboard is in the discoverable mode. If you don’t pair your keyboard with your Mac within three minutes, the indicator light and keyboard will turn off to preserve battery life. If this happens, press the On/Off switch to turn your keyboard on again.
    • When using third-party devices, check with the keyboard manufacturer for additional information.
  • Not paired or connected to another device

If your keyboard responds intermittently or cannot maintain a connection:

  • Ensure that the keyboard has sufficient charge or fresh batteries
  • Check for nearby sources of interference, including other wireless devices, Bluetooth transmitters, and so on
  • Try unpairing and then repairing your keyboard with Apple TV

Compatibility with other Bluetooth accessories

  • Bluetooth support on Apple TV is for keyboards only. Headsets, speakers, and other devices are not supported.
  • If you are having difficultly connecting or using a third-party Bluetooth keyboard, contact the manufacturer to verify that it is compatible with Apple products and Apple TV.

__________

Document Source: http://support.apple.com/kb/HT5633

Categories
articles

Apple 17″ MacBook Pro Notebook Computer Battery Expanded, Swelling, Rupturing, and Bursting

According to Apple’s documentation on the 17″ MacBook Pro, the battery that comes with the notebook computer is designed to provide reliable service over about 5 years. The Apple documentation states that this single battery is so well constructed that a similar 5-year lifespan would normally require three batteries. Unfortunately, the real-world experiences of end-users demonstrate that the battery has a manufacturer defect of some kind that results in severe expanding and bursting. The images below are an example of what can happen with this battery.

“I called technical support and was told that batteries are expected to last for a year, and after that, this kind of expanding and rupturing of the battery cells is expected. Customers just need to purchase new batteries when this happens. That’s what I was told. Yet, I think it’s odd considering that I know of no other notebook products that have this problem with older batteries.” ~ Greg Johnson

Best Practices. For just about any notebook computer, it’s best to leave the battery disconnected while in storage.